Practical advice on maintaining, repairing, and improving masonry around your home-written by the team at Abbys Masonry Corp.
Years Experience
Free Estimates
Licensed & Insured
If you’ve got pavers on your driveway, patio, or walkway, you’re already ahead of the game. Pavers are one of the most durable surfaces you can install-but they do need a little attention to stay looking and performing their best year after year.
Winter is tough on polymeric sand. Freeze-thaw cycles, snowplowing, and heavy rain can wash or displace the sand that locks your pavers in place. Walk your paver surface each spring and look for joints that have opened up, feel soft underfoot, or show signs of weed growth starting. Loose joints allow pavers to shift and create trip hazards over time. Re-sanding and recompacting early in the season prevents more significant movement later-and it’s a quick fix when caught early.
A paver sealer does two important things: it protects the surface from oil stains, water absorption, and UV fading, and it helps lock the joint sand in place. You don’t need to seal every year-every two to three years is enough for most residential applications. Before sealing, clean the surface thoroughly and let it dry completely-at least 24 hours. Sealing wet pavers traps moisture and can cause hazing. Use a sealer rated for your specific paver type-tumbled pavers, smooth pavers, and natural stone each have different requirements.
A paver that has dropped below the surrounding surface is both a drainage problem and a trip hazard. The good news is that individual pavers can be lifted and reset without disturbing the rest of the surface-it’s one of the biggest advantages over poured concrete. If you notice a low spot, address it before water starts pooling there. Standing water accelerates settling and can compromise the base layer underneath over multiple freeze-thaw cycles.
Rock salt and calcium chloride can damage paver surfaces over time and accelerate the deterioration of polymeric joint sand. Use sand or a paver-safe ice melt product instead for traction on slippery surfaces in winter. If you use a snowblower, set the blade slightly above the paver surface to avoid catching edges and flipping stones. A rubber cutting edge on your snowblower is worth the investment if you have a large paver surface.
That chalky white residue you sometimes see on brick and paver surfaces is called efflorescence. It’s caused by water moving through the masonry and pushing mineral salts to the surface. On pavers, it’s typically a cosmetic issue-but it can indicate that moisture levels are higher than normal. Efflorescence can be cleaned with a diluted masonry cleaner and a stiff brush. Avoid cheap acid-based cleaners that can etch and pit the paver surface. If it keeps returning, the source of excess moisture is worth investigating.

Your chimney takes more weather abuse than almost any other part of your home. It’s up there through every rainstorm, freeze, and heatwave-and most homeowners don’t look at it closely until something goes wrong inside. Here are five signs that it’s time to call a mason before the damage gets worse.
That chalky white residue on chimney brick is called efflorescence. It forms when water moves through the masonry and pushes mineral salts to the surface. On a chimney, it’s a reliable indicator that the structure is absorbing more moisture than it should. Left untreated, that excess moisture leads to spalling-where the face of bricks break away-and eventually to structural damage that goes well beyond a cosmetic fix.
Mortar joints seal the gaps between bricks. When they crack or erode-which happens gradually from exposure to freeze-thaw cycles and weathering-water gets in. In winter, that water freezes, expands, and widens the damage from the inside out. If you can see gaps in the mortar joints from ground level, repointing is overdue. Catching this early keeps the repair limited to the joints. Waiting allows moisture to reach the brick faces and the interior chimney structure.
The crown is the concrete cap at the very top of the chimney. It’s designed to seal off the top of the chimney structure and shed water away from the flue. Cracks in the crown let water pour directly into the chimney from above-the worst possible entry point for moisture. Most chimney crowns fail because they’re built too thin-often just a half inch of standard masonry mortar with no polymer modification. That material has no flexibility and cracks within a few seasons. A properly repaired or rebuilt crown, made with high-psi polymer-modified cement, should last many years.
Spalling is when the face of a brick breaks away-you’ll see chunks, flakes, or pits on the brick surface. It happens when moisture inside the brick repeatedly freezes and forces the surface to pop off. A few spalled bricks might look like a minor cosmetic issue, but they expose the interior of the brick to accelerated moisture absorption. Once spalling starts, it progresses faster than most people expect. Each winter adds more damage to the now-exposed brick interior. Addressing it early-either through brick replacement or veneer refacing-stops the cycle.
If you’re seeing stains on the ceiling or wall near your fireplace, smelling a musty odor when the fireplace is closed, or noticing water in the firebox after heavy rain — water is getting into the chimney. The source could be a cracked crown, failed flashing, deteriorated mortar joints, or spalled brick. The staining inside is usually the last sign to appear, not the first. By the time you see it, the exterior masonry damage has typically been developing for one or more seasons. A proper inspection identifies where the breach is and what repair is needed.
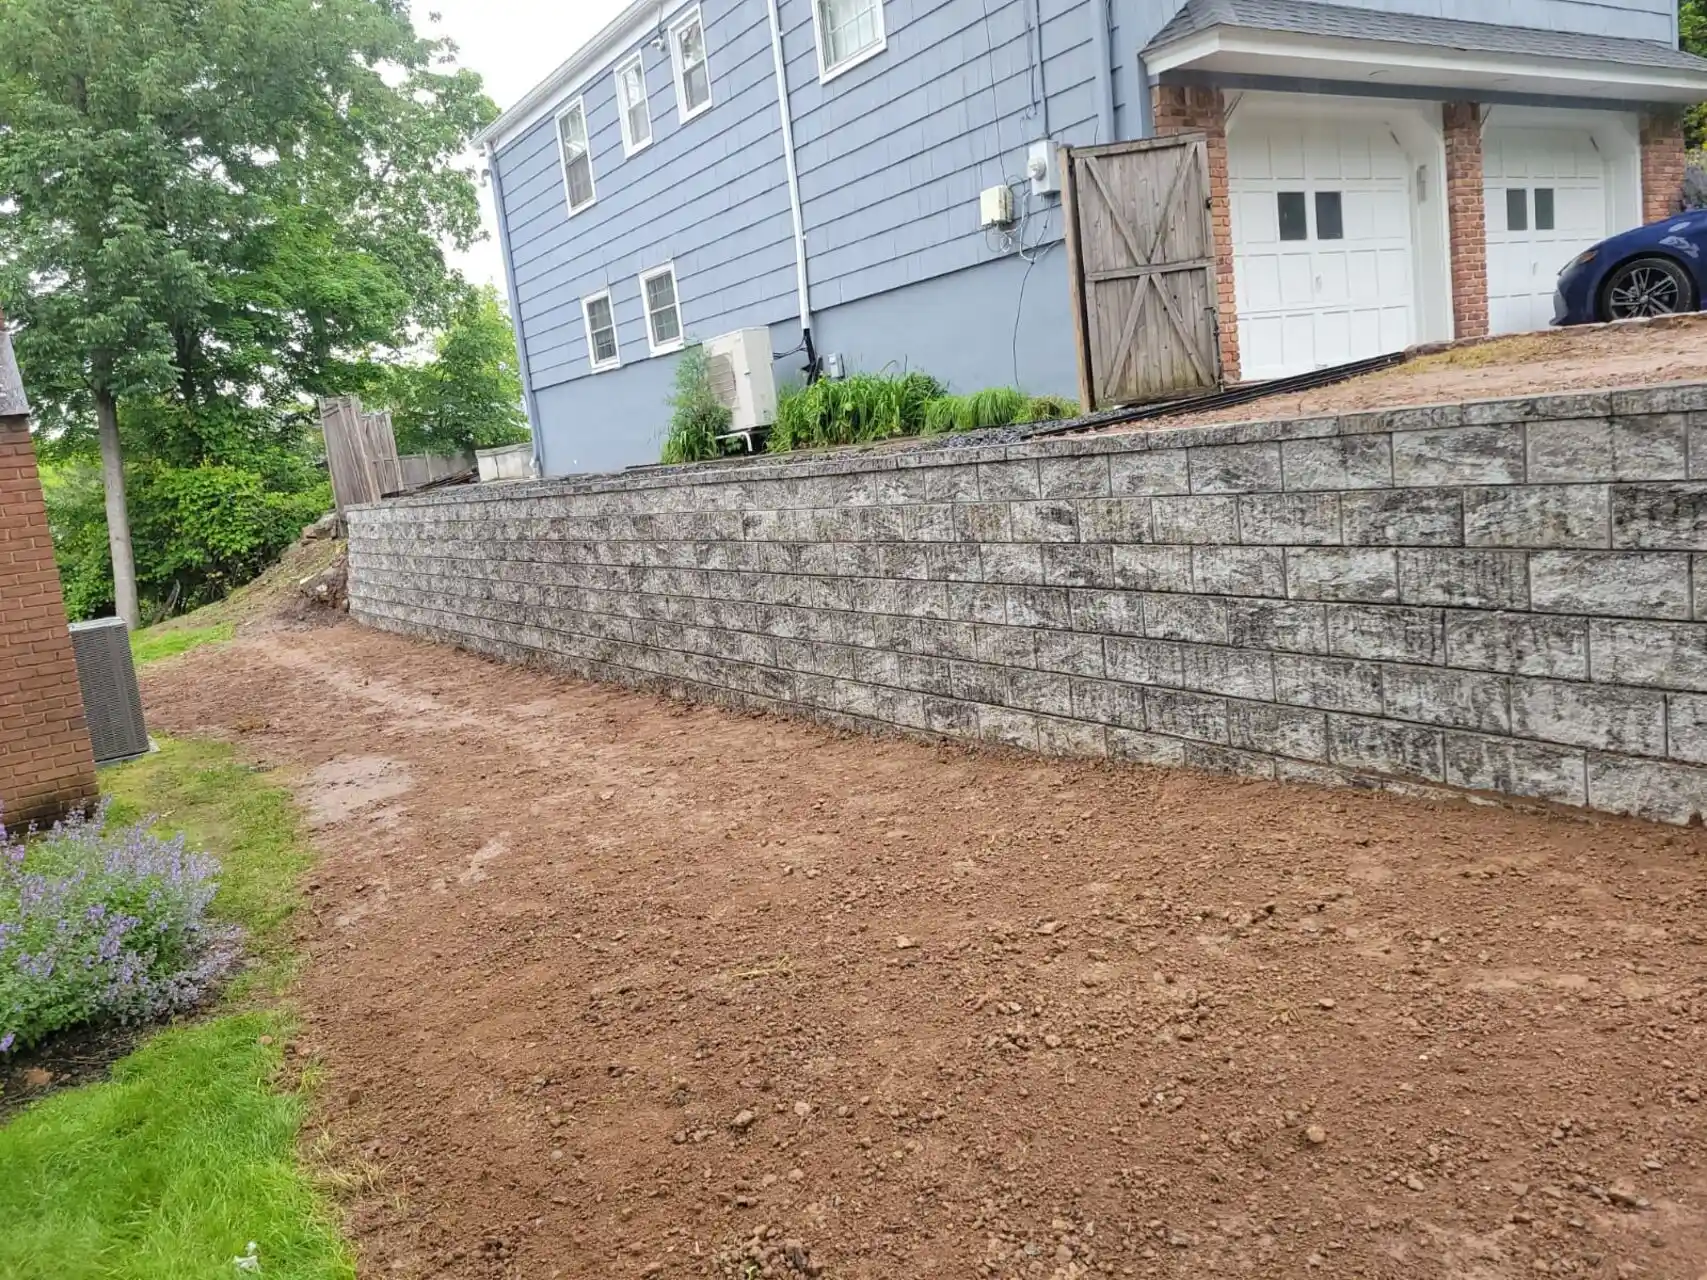
If you’ve ever seen a retaining wall that bulges outward, leans, or has started to collapse, there’s a very good chance drainage was the problem-not the wall material and not even the installation quality. Water pressure is the leading cause of retaining wall failure in New Jersey, and it’s entirely preventable when drainage is designed into the wall from the start.
When soil behind a retaining wall becomes saturated from rain or irrigation, it becomes significantly heavier than dry soil. That added weight pushes outward against the wall face. Without a drainage system to relieve that pressure, the force builds every time it rains-and eventually exceeds what the wall was built to resist. This is why you’ll sometimes see a retaining wall fail after a particularly wet season, even if it looked fine for several years before. The wall was being stressed progressively, and the wet season pushed it past the tipping point.
A properly built retaining wall includes a perforated drain pipe installed at the base of the backfill zone, surrounded by clean crushed gravel. As water moves down through the saturated soil, it reaches the gravel layer, drains quickly to the pipe, and is carried away from the wall-releasing the hydrostatic pressure before it can build. This pipe is not a nice-to-have. It’s a structural component of the wall system. A wall built without it is working against water pressure every time it rains.
Clay and dense native soils hold water. Gravel doesn’t. Using clean crushed gravel as the backfill directly behind the wall allows water to move quickly down to the drain pipe rather than saturating and expanding against the wall face. This detail alone makes a significant difference in how a wall performs over time — particularly in New Jersey where clay-heavy soils are common in many areas. Even well-engineered walls can underperform if backfilled with the wrong material.
In addition to the drain pipe at the base, block retaining walls often include weep holes-small gaps left at the base of the wall face-to allow any water that does build up behind the wall to escape through the face rather than building pressure. If you have an existing block retaining wall and notice that water never seems to drain after heavy rain, the drainage system behind the wall may be inadequate or absent. This is worth having evaluated before the wall shows more serious signs of movement.
For walls over approximately 3 feet, drainage alone isn’t sufficient-the wall also needs mechanical reinforcement to resist the horizontal soil pressure at height. Geogrid reinforcement is a strong mesh fabric installed in horizontal layers between courses of block and anchored back into the slope behind the wall. It works by distributing the soil load across a much wider area than the wall face alone could handle. For taller retaining walls in New Jersey-particularly those holding sloped residential yards-geogrid is a standard requirement, not an upgrade.